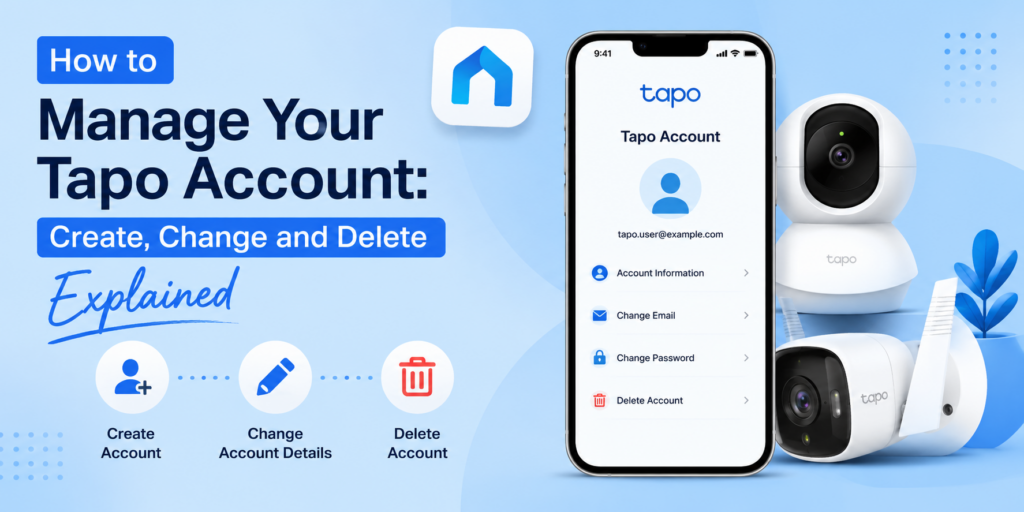
How to Manage Your Tapo Account: Create, Change and Delete Explained
Managing your Tapo account depends on which account you mean. Your TP-Link ID is used to log into the Tapo app, while the Tapo Camera Account is a separate local account used for RTSP, ONVIF and NAS connections.
Many Tapo users think there is only one account for their camera. That is not true. In fact, Tapo uses two different accounts. One is your TP-Link ID and the other is the Camera Account inside the camera.
This confuses many users.
For example, I once helped a friend connect a Tapo C210 camera to a Synology NAS. He kept entering his TP-Link email and password into the NAS setup page. It never worked. After checking the camera settings, we realized the NAS needed the Camera Account, not the cloud login. The issue was fixed in less than five minutes.
This happens more often than you think.
If you are trying to:
- create a Tapo camera account,
- change your Tapo account email,
- delete your TP-Link ID,
- use RTSP or ONVIF,
- connect your camera to NAS, this guide explains everything in simple words.
By the end of this article, you will clearly understand tapo camera account create, change, and delete without any confusion.
Two Different “Tapo Accounts” — Know Which One You Need
Many people use the words “Tapo account” for both accounts. However, they work differently.
Feature | TP-Link ID | Tapo Camera Account |
Used for Tapo App | Yes | No |
Email Login | Yes | No |
Cloud Services | Yes | No |
RTSP Streaming | No | Yes |
ONVIF | No | Yes |
NAS Recording | No | Yes |
Camera Local Login | No | Yes |
Remember this simple rule.
- TP-Link ID = Cloud account.
- Camera Account = Local camera login.
Knowing this difference saves a lot of troubleshooting later.
TP-Link ID (Cloud Account — App Login, Email-Based)
Your TP-Link ID is the account you create when you first install the Tapo app.
It lets you:
- Manage cameras remotely
- Receive notifications
- Store cloud recordings
- Share devices
- Control cameras from anywhere
Your login uses:
- Email address
- Password
Think of it as your online account.
Tapo Camera Account (Local Login — NAS/RTSP/ONVIF/Third-Party Viewers)
The Camera Account is completely different. It is created inside the camera. It is mainly used when connecting your camera to:
- NAS devices
- RTSP software
- ONVIF applications
- VLC Media Player
- Blue Iris
- Home Assistant
- Surveillance Station
This account has:
- Username
- Password
It does not use your email address.
Part 1 — Managing Your TP-Link ID (Cloud Account)
Let’s first manage the cloud account.
How to Create a TP-Link ID
If you are setting up a new camera, this is the first account you need.
Steps
Step 1
- Download the Tapo app from Google Play Store or Apple App Store.
Step 2
- Open the app and tap Sign Up.
Step 3
Enter:
- address
- Strong password
- Choose a password you can remember. Avoid simple passwords.
Step 4
- Check your email inbox.
- TP-Link sends a verification email.
- Open it.
- Click Verify.
Step 5
- Return to the Tapo app and log in. Now your TP-Link ID is active. You can start adding cameras.
Quick Tips
Do | Don’t |
Use your personal email | Use a temporary email |
Enable two-factor protection if available | Share your password |
Keep recovery email active | Ignore verification emails |
How to Change Your TP-Link ID Email
Many users ask:
Can I simply change my TP-Link ID email?
Unfortunately, the answer is No. TP-Link currently does not allow you to directly edit the email address linked to your TP-Link ID. Instead, you need to create a new TP-Link ID using a different email and move your devices.
Typical process
- Create a new TP-Link ID.
- Remove devices from the old account.
- Log into the new account.
- Add the cameras again.
- Share devices again if needed.
Although it takes a few minutes, it is the only supported method. If you recently bought a used camera, creating a fresh TP-Link ID is usually the safest option.
You can also check our guide on how to reset Tapo camera as a factory reset is often required before moving the device to another account.
How to Change Your TP-Link ID Password
Changing your password regularly improves security. Follow these steps inside the Tapo app:
- Open the app.
- Tap Me.
- Open Account.
- Choose Change Password.
- Enter the current password.
- Enter the new password.
- Save changes.
Try using:
- uppercase letters
- lowercase letters
- numbers
- symbols
A stronger password protects your cameras from unauthorized access.
How to Delete Your TP-Link ID
Sometimes users no longer use Tapo products. In that case, they may want to distinguish how to delete Tapo account. Deleting the TP-Link ID permanently removes your cloud account.
Steps
- Log into your TP-Link account.
- Open Account Settings.
- Select Delete Account.
- Verify your email.
- Complete the short feedback survey.
- Confirm deletion.
Once confirmed, the account enters the deletion process.
Before deleting, remember this
You Will Lose | Status |
Cloud recordings | Deleted |
Device management | Lost |
Device sharing | Removed |
Remote access | Disabled |
Saved account settings | Deleted |
Important Note:
Deleting your TP-Link ID is irreversible. Always download any important recordings before deleting your account. If you plan to continue using your cameras, deleting the account is usually not recommended.
Part 2 — Managing Your Tapo Camera Account (Local Login)
Now let’s look at the second account. Many users never notice it until they connect the camera to NAS or RTSP software. This account is created directly inside the camera settings. It has nothing to do with your TP-Link email.
What the Camera Account Is Actually For
The Camera Account allows other software to securely connect to your camera.
Common examples include:
- Synology NAS
- QNAP NAS
- Blue Iris
- VLC Player
- Home Assistant
- ONVIF-compatible software
- RTSP streaming applications
Without this account, many third-party applications cannot access your camera.
Here is a simple comparison.
Usage | TP-Link ID | Camera Account |
View camera in Tapo app | Yes | No |
RTSP stream | No | Yes |
ONVIF software | No | Yes |
NAS recording | No | Yes |
Third-party monitoring | No | Yes |
This explains why using your TP-Link email for RTSP login always fails.
How to Create a Camera Account
Creating a Tapo Camera Account only takes a minute.
Step 1: Open the Tapo app and select your camera.
Step 2: Tap Live View.
Step 3: Tap the Settings icon.
Step 4: Open Advanced Settings.
Step 5: Select Camera Account.
Step 6: Create:
- Username
- Password
- Tap Save.
Your camera account is now ready. You can now use these credentials when setting up:
- RTSP
- ONVIF
- NAS recording
- Third-party surveillance software
Example
When I connected a Tapo C320WS to a Synology NAS, the NAS setup wizard asked for a username and password. At first, I entered my TP-Link email and the connection failed every time. After creating the Camera Account inside Advanced Settings, I entered the new username and password. The NAS connected immediately. That small difference solved the whole problem.
How to Change the Camera Account Username/Password
Changing your camera account is easy. You may want to do this if you forgot the password, shared it with someone or want better security.
Steps to change the Camera Account
- Open the Tapo app.
- Select your camera.
- Tap Live View.
- Open the Settings icon.
- Go to Advanced Settings.
- Tap Camera Account.
- Enter a new username or password.
- Save the changes.
The new credentials become active immediately.
Important Note:
If your camera is already connected to a NAS or RTSP software, those connections will stop working until you update the new username and password there as well. For example, if your Synology NAS was using the old password, recording will fail until you update it.
After Changing Camera Account | What You Should Do |
Synology NAS | Update username and password |
QNAP NAS | Update credentials |
VLC Player | Enter new login details |
Blue Iris | Update camera settings |
Home Assistant | Reconfigure RTSP login |
This is one of the most common reasons users think their camera has stopped working.
How to Delete/Reset the Camera Account
Unlike the TP-Link ID, the Camera Account does not have a separate “Delete” button. Instead, you reset or recreate it. There are two common ways to do this.
Method 1: Create a New Camera Account
Simply open Camera Account in the settings and replace the existing username and password. The old credentials stop working.
Method 2: Factory Reset the Camera
If you cannot access the Camera Account or have forgotten the credentials, perform a factory reset.
After the reset:
- Camera settings are erased.
- The Camera Account is removed.
- You need to set up the camera again.
- You can create a new Camera Account.
Also check our guide on How to Reset Tapo Camera.
What happens after deleting or resetting the Camera Account?
Existing connections will stop working. This includes:
- RTSP streams
- ONVIF software
- NAS recording
- Third-party monitoring applications
You will need to enter the new Camera Account credentials before these services work again.
Common Mistakes and Mix-Ups
Many support requests happen because users confuse the two Tapo accounts. Here are the most common mistakes.
Trying to Use TP-Link ID Credentials for RTSP/NAS
This is possibly the biggest mistake. Users enter their TP-Link email address inside:
- Synology Surveillance Station
- Blue Iris
- VLC Player
- ONVIF software
The login always fails.
Why?
Because these programs require the Camera Account, not your cloud account.
Remember this simple rule
Login Type | Use Here |
TP-Link ID | Tapo app |
Camera Account | RTSP, ONVIF, NAS |
Whenever you see a username field instead of an email field, it usually means the Camera Account is required.
Forgetting Camera Account Details
Unlike your TP-Link ID, the Camera Account does not support cloud password recovery. If you forget the username or password, you cannot simply click Forgot Password.
Instead, you may need to:
- Access the camera if you’re still logged in.
- Change the credentials.
- Or perform a factory reset if you’re completely locked out.
A good habit is to save the Camera Account details in a protected password manager.
What Happens to Camera Account Settings After a Factory Reset?
A factory reset removes all local settings. This includes:
- Wi-Fi settings
- Camera Account
- Motion detection preferences
- Recording schedules
- Network settings
After the reset, you must:
- Connect the camera to Wi-Fi again.
- Log in with your TP-Link ID.
- Create a new Camera Account if you use RTSP, ONVIF or NAS.
Troubleshooting
Sometimes everything looks correct, but you still face issues. Here are the most common problems and their solutions.
Verification Email Not Arriving
This usually happens while creating or deleting a TP-Link ID. Try these steps:
- Check the Spam folder.
- Check Promotions in Gmail.
- Wait a few minutes.
- Make sure you entered the correct email address.
- Request a new verification email.
If you still don’t receive it, try using alternative email provider.
“Camera Account” Option Missing in Advanced Settings
Some users cannot find the Camera Account menu. Possible reasons include:
- Older firmware version
- Camera model limitations
- Unsupported device
- App needs updating
Try these fixes:
- Update the Tapo app.
- Update the camera firmware.
- Restart the camera.
- Restart your phone.
If the option still does not appear, check whether your camera model supports RTSP and ONVIF. Not every Tapo camera includes these features.
Locked Out of Both Accounts — Recovery Steps
If you’ve forgotten both your TP-Link ID password and Camera Account password, don’t panic.
Follow this order:
Step 1: Recover your TP-Link ID password using the Forgot Password option.
Step 2: Log back into the Tapo app.
Step 3: If you can still access the camera, change the Camera Account password.
Step 4: If the Camera Account cannot be recovered, perform a factory reset and create a new one.
Most users can regain access within a few moments.
Quick Comparison
Task | TP-Link ID | Camera Account |
Create | Yes | Yes |
Change Password | Yes | Yes |
Change Email | Not directly supported | Not applicable |
Delete | Yes | Via reset/recreation |
Password Recovery | Email recovery | No cloud recovery |
Used for NAS | No | Yes |
Used for RTSP | No | Yes |
Used for ONVIF | No | Yes |
Best Practices for Managing Both Accounts
Following a few simple habits can save you time later.
Best Practice | Why It Matters |
Use different strong passwords for both accounts | Better security |
Save Camera Account credentials securely | No recovery option available |
Keep firmware updated | Access the latest features and fixes |
Test RTSP or NAS after changing credentials | Avoid recording interruptions |
Enable cloud security features when available | Protect remote access |
These small steps can prevent many common problems.
Frequently Asked Questions
What’s the difference between a TP-Link ID and a Tapo camera account?
A TP-Link ID is your cloud account used to sign in to the Tapo app and manage devices remotely. A Tapo Camera Account is a separate local account created inside the camera for RTSP, ONVIF, NAS and other third-party software connections.
Can I delete my TP-Link ID without losing camera footage?
Deleting your TP-Link ID removes access to cloud services and cloud recordings linked to that account. However, recordings stored locally on a microSD card or a NAS remain available unless you manually erase those storage devices.
Can I recover a deleted Tapo camera account password?
No. The Camera Account does not support cloud-based password recovery. If you forget the credentials and cannot access the settings, you will usually need to reset the camera and create a new Camera Account during setup.
Does deleting my TP-Link ID also delete the camera account?
No. These are two separate accounts. Deleting your TP-Link ID removes your cloud account and remote device management, but the Camera Account stored inside the camera remains until it is changed or removed through a reset.
Final Thoughts
Understanding the difference between a TP-Link ID and a Tapo Camera Account makes managing your camera much easier. Although both are often called “Tapo accounts,” they serve different purposes.
Use your TP-Link ID to sign in to the Tapo app, manage devices remotely, receive notifications and access cloud services. Use the Camera Account only when connecting your camera to RTSP, ONVIF-compatible software or a NAS.
If you’re planning to create, change or delete a Tapo camera account, always identify which account you need first. This simple step can save you from login errors, failed RTSP connections and unnecessary troubleshooting.